I’ve mentioned before that Tom doesn’t really love dessert. That’s just one way he keeps such a trim frame of mostly sinew and muscle. He does love my homemade blackberry pie, though. I made it for Easter and figured I should share the recipe here since it’s probably the most complicated recipe I use that’s really “mine.”
Here’s the story of this recipe. A few years ago my friend Amanda was getting married and in lieu of having cake, she asked several of her friends, including me, to make pie to serve at the reception. I’d made pie before, but I took this as an opportunity to really perfect the craft. Back then I had every Friday off work, so every Friday I made a blackberry pie, each time tweaking the recipe just a bit until it was just how I wanted it.
This is the result.
This post has a lot of text and a bunch of pictures through the process, but if you just want to skip to the recipe, it’s at the bottom.
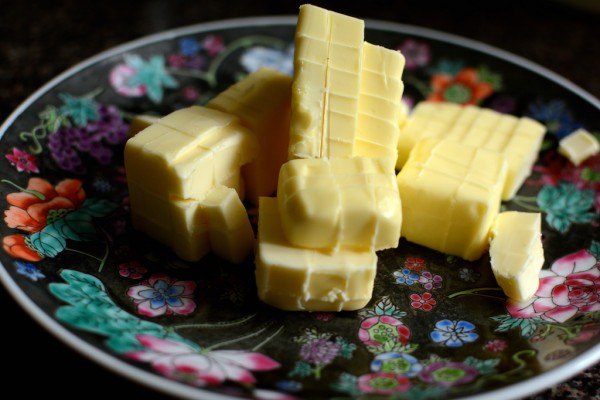
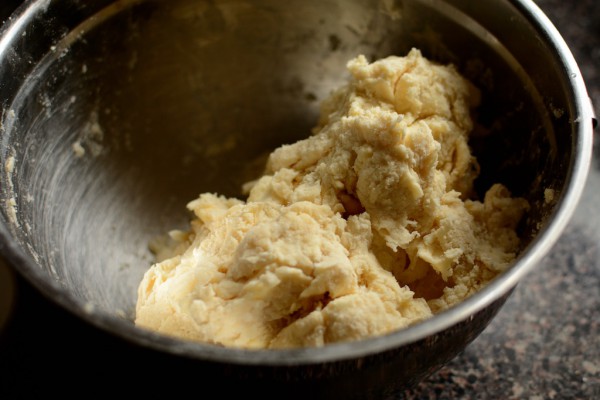
The recipe starts the way all good recipes start: with a ton of butter. Chilled, cubed, and mixed with flour. This mixture also has shortening in it. Do not try to get all fancy and healthy and sub out the shortening for something that is easier on your arteries. Shortening is essential for a great pie crust, said every Southern woman ever.
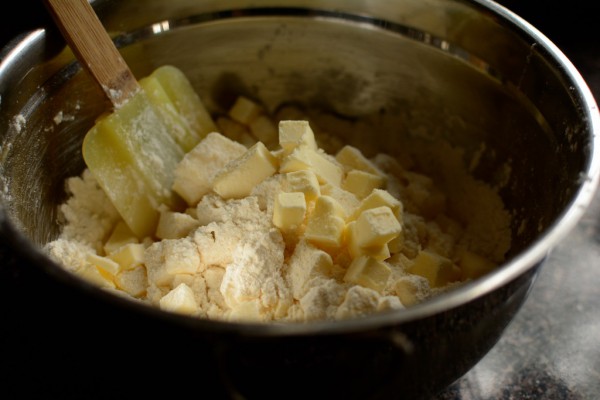
It’s also important to note that, when you’re making pastry, the temperature of the ingredients matters. When I was first making this pie, it was the dead of summer and our house didn’t have air-conditioning. The location of my kitchen and orientation of the windows placed us exactly four feet from the surface of the sun, and all the while my oven was preheating to 425. It was hot. In fact, it was so hot that the butter would be soft by the time I finished cubing it, resulting in a slimy, sticky crust, so I started freezing the butter and the shortening and the ice cold water. My recipe has all kinds of notes about chilling the ingredients and NOT USING YOUR HANDS! But then we moved away from the surface of the sun and freezing wasn’t necessary anymore.
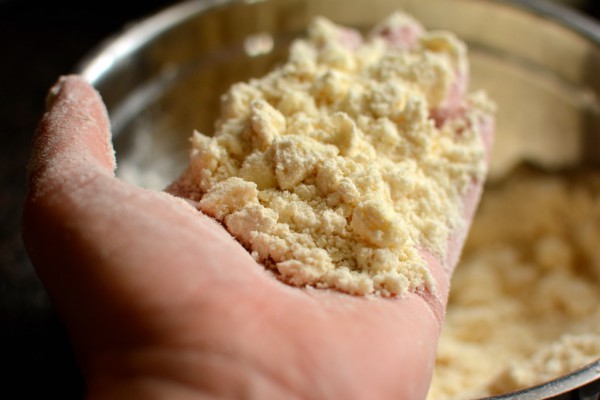
All that to say, if you live inside a clothes dryer or in my old townhouse, you might need to stick the ingredients in the freezer for a bit. Otherwise, just keep in mind that when you’re making pastry it’s important that the butter is cold, and use a pastry cutter instead of your hands.
Add water and work gently until the dough comes together. This is what I mean by “comes together.” As soon as it forms any shape at all, step away. You are done.
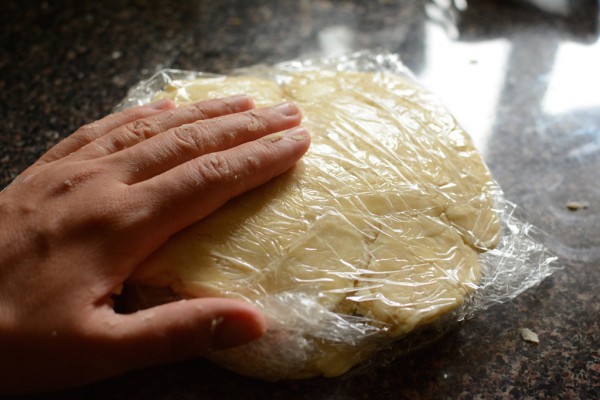
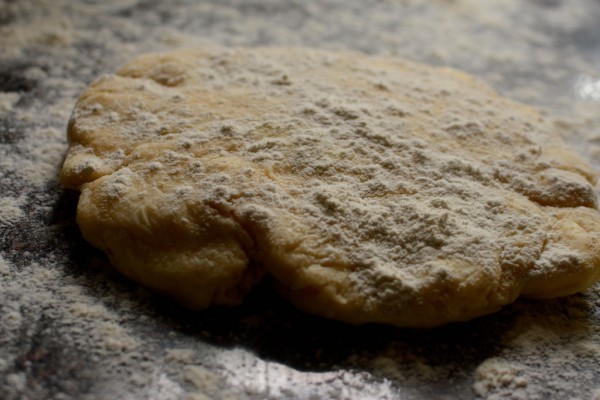
Next, divide the dough into two balls and flatten to form a disc. Then cover each disc with plastic wrap and chill in the fridge for at least 30 minutes.
I put my hand on the disc for scale (if I’d been in my old kitchen the heat from my hand on the dough would have melted right through to the counter) and was horrified by how weird, red, and swollen my hand looks. And that’s my good hand. My other hand looks even crazier because when I was 14 a horse kicked me and shattered two of my metacarpals and they never quite healed correctly. And when I saw this picture I thought, “Man, I should have used my other hand because I could have told that story.” But then I told it anyway.
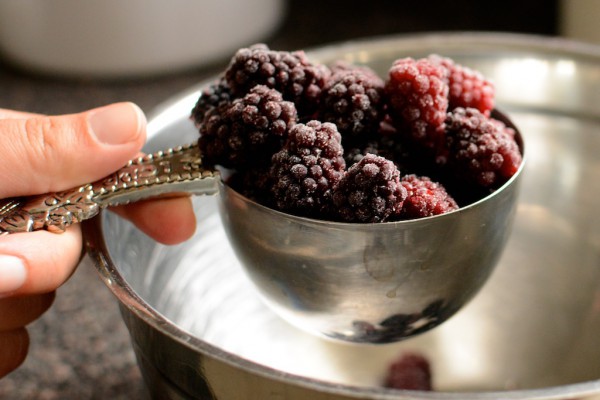
Next up, the filling. It’s the easiest part.
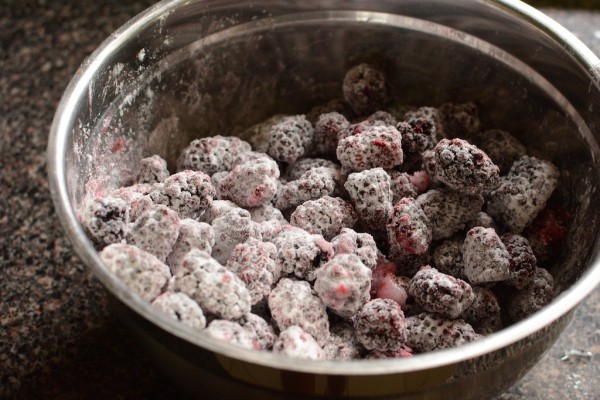
I start with frozen blackberries. Frozen, I know. But they’re way cheaper than fresh, and I really don’t think there’s a difference. Plus, I’ve read that they’re just as healthy as fresh berries. Don’t judge me, that’s what I’m asking of you.
Here’s also the only place in this recipe where I go off the rails a bit. My pie pan is big, so I measure out heaping cups of blackberries. If you’re using a smaller pie pan (like the disposable aluminum ones) restrain yourself and measure out actual cups.
Mix with sugar, cornstarch, and lemon. Don’t skip the lemon. The lemon is really, really important. I probably squeeze about a half a lemon in each pie.
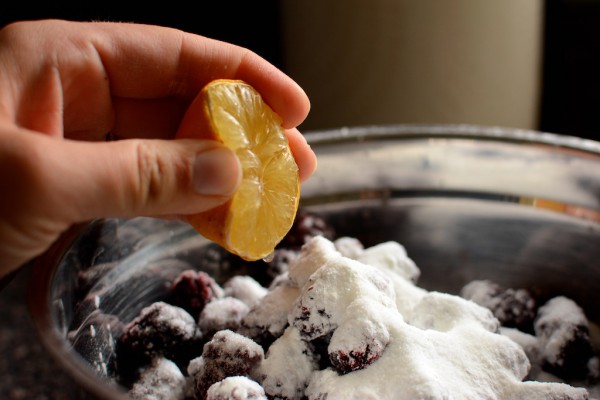
Mix it all together until the berries are coated. Be warned, you’ll have a lot of extra mixture at the bottom of the bowl. Just dump that over the berries when you put it in the pie crust.
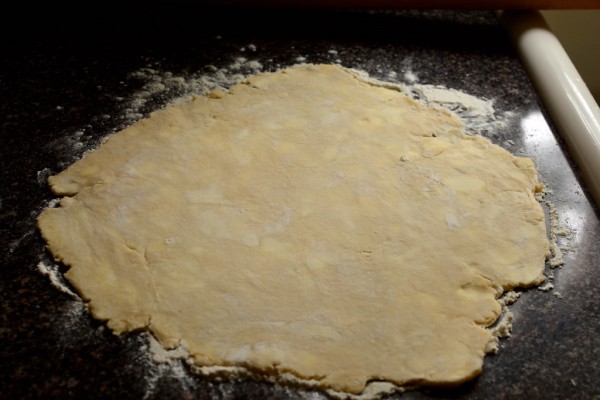
Back to the crusts. Once they’re chilled, place them on a floured surface, and dust the crust and your rolling pin with flour, too. Then roll it out to about 10 inches.
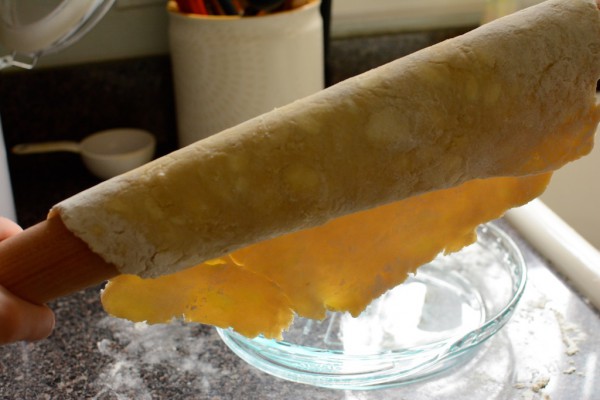
Now, if you’re like me, the first time you do this you’ll look at this giant pie crust and panic. Because how do you pick this thing up and put it in the pie pan? This is particularly difficult if your kitchen is four feet from the surface of the sun and your chilled crust is melting.
Here’s a tip I found in an old cookbook: roll your crust up with your rolling pin. Then unroll it over the pie pan.
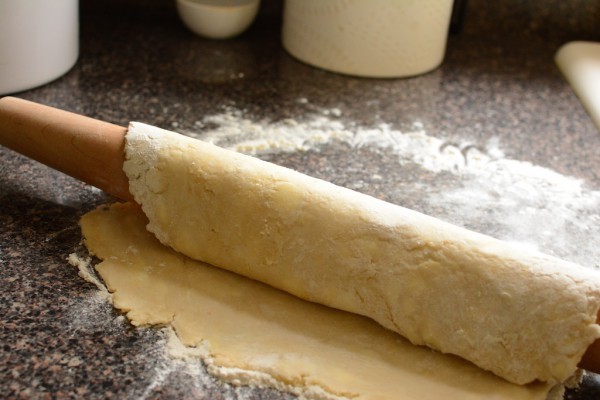
Boom! Look how cavalier I’m being with my crust! I can just hold it up and take photos of it as if it’s not a super-delicate pastry that I would CRY OVER if it broke!
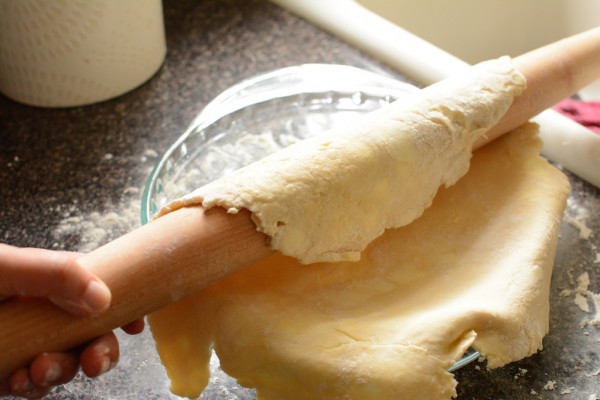
Beautiful. And so much easier than doing it with your hands.
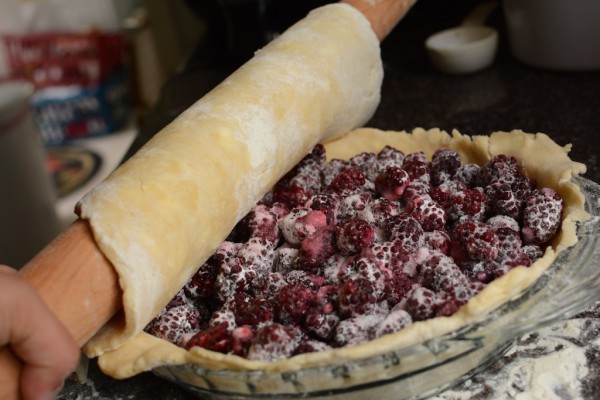
Then dump the berries in the crust, and do the same thing with the other disc.
You’re done!
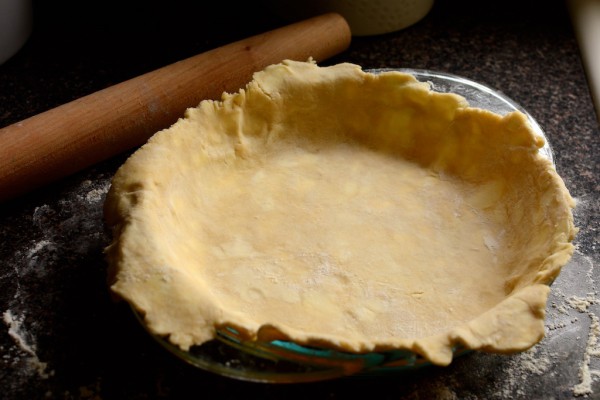
Just kidding. Now you have to trim the crust and make the edges. This is where pie fatigue sets in for me and I stop caring what the pie looks like. That’s why my edges are not beautiful. If you want beautiful edges, I’m sure there are tutorials on Pinterest and if you find a really easy one you should totally send it to me.
I also slice vents in the crust. (For Amanda’s wedding I cut out little hearts and it sort of looked like this. If you don’t get pie-fatigue, the options are endless here. If you DO get pie fatigue, it doesn’t matter because the pie will taste amazing regardless of the decorations.)
You’ll have some leftover pie crust. This is what I do with my leftover dough: I give it to my husband and, because he says things to me like, “Amanda, what can I do to make my waist bigger?” I instruct him to dip it in cinnamon-sugar and eat it.

Before you pop it in the oven, brush it with a little milk and sprinkle it with sugar for a glaze.
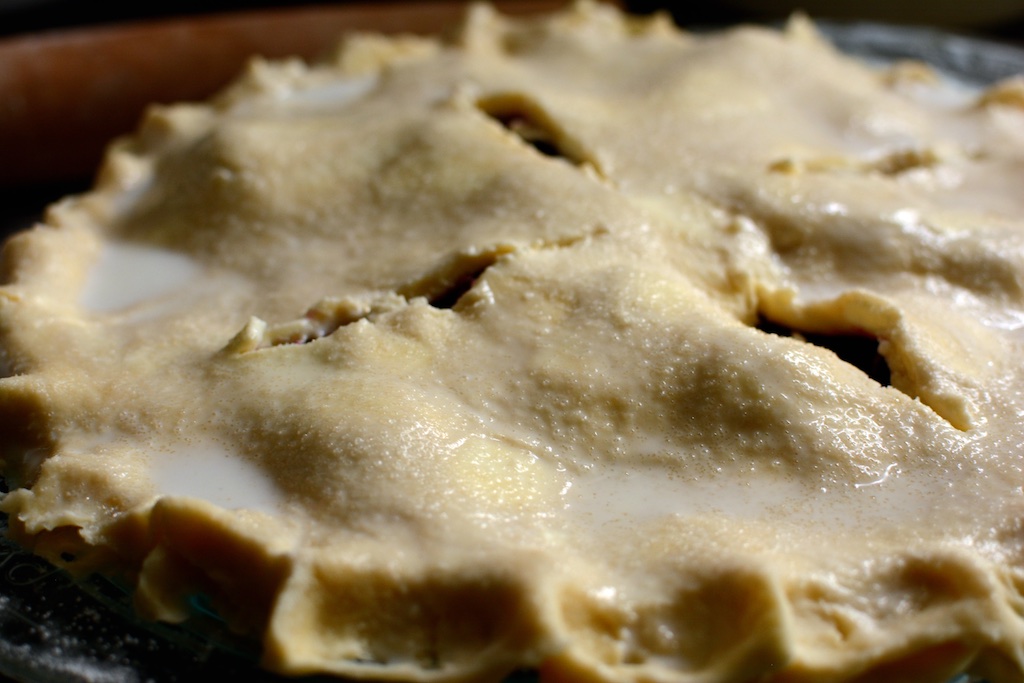
And I forgot to take a picture (pie fatigue, remember?) before putting it in the oven, but put aluminum foil around the edges or they’ll burn. Pro tip.

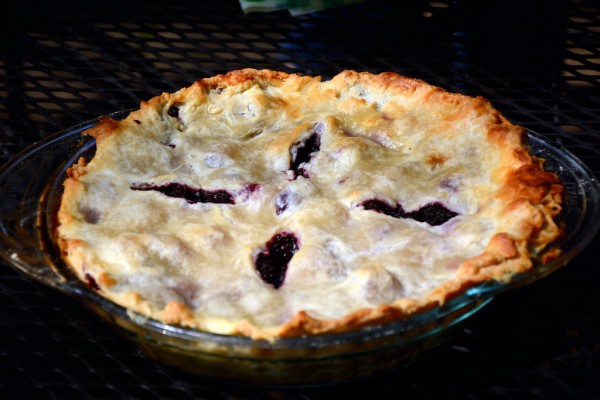
VIOLA! The finished product!!
And now I’m going to diverge and take a moment and make a case for a great 35mm lens. All the pictures I shot of the recipe were with our (prime) 35mm lens. Between making and serving, I switched lenses to take pictures at the Easter race, and didn’t have time to switch back. The photo below was with our (zoom) kit lens (18-105mm). CAN YOU BELIEVE THE DIFFERENCE!? I mean, I realize it’s not a super-beautiful pie anyway, but the photo doesn’t do it any favors.
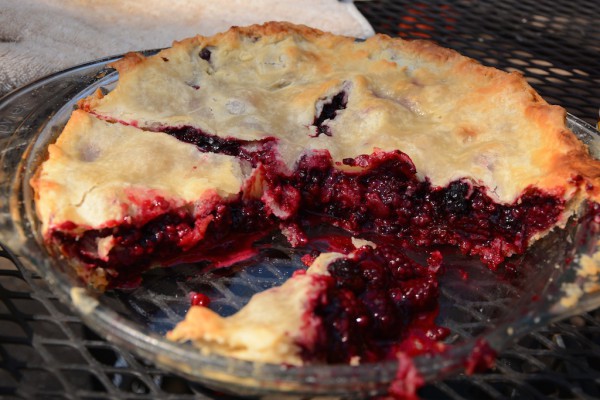
And, ok, you make a great point. The lighting conditions are different. The recipe shots are inside at a sunny window and the above photos were taken outside. So I took the rest of the pie inside, and took a photo using our zoom lens at the exact same spot and time of day as the recipe photos. Not great, right?
I LOVE my prime lens, and this is why. Because it’s amazingly light sensitive, creates beautiful bokeh, and (mainly) because it makes me a much better photographer than I am.
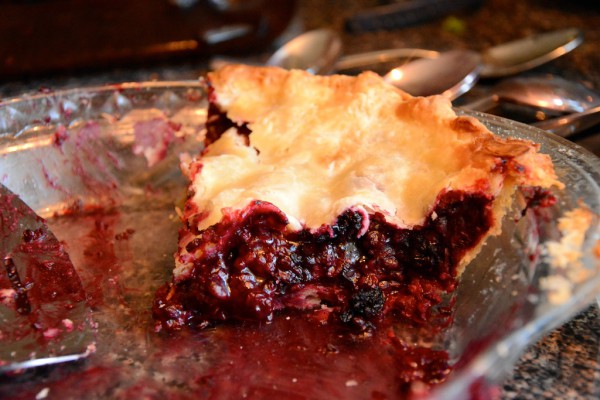
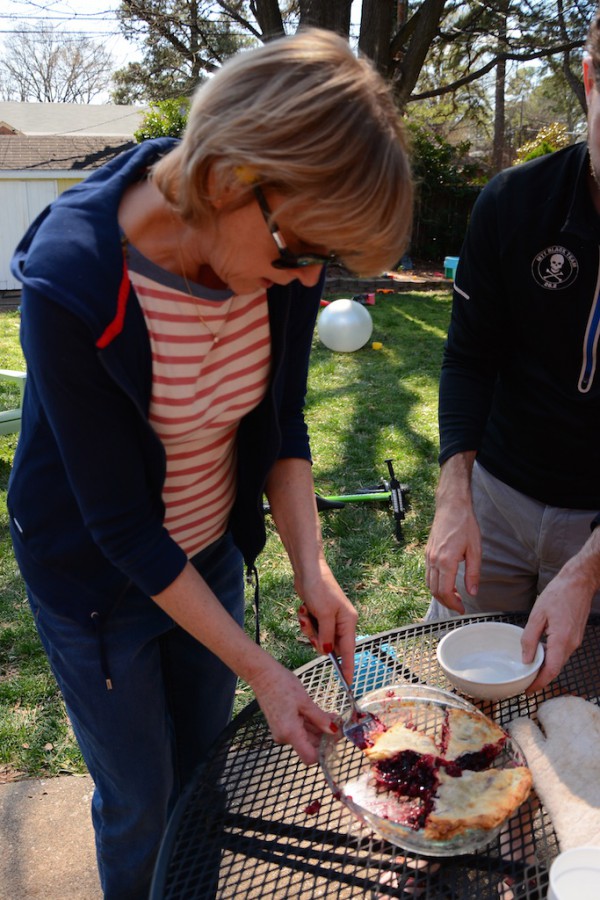
Since the photos of the pie are only ok, to prove how delicious the pie is, here’s a picture of my mom slicing and serving (and Tom clamoring for a piece).
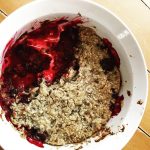
And my sweet niece, who smashed up her slice with ice cream ate it all, and then asked for another piece.

Tom’s Absolute Favorite Blackberry Pie
Ingredients
Crust (makes top and bottom for a 9-inch pie)
2 1/2 C all-purpose flour
1/2 tsp. salt
3 T white sugar
1/4 C shortening, COLD
12 T butter, cold and cubed
1/2 C ice water
Filling
4 C blackberries (fresh or frozen)
4 T cornstarch
1/2 C sugar
Dab lemon
Milk and sugar for glaze
Directions
– In a mixing bowl, sift flour, salt and sugar. Add shortening and break into the flour with your hands. Add cubed butter and work it into the mixture with a pastry cutter. If possible, don’t use your hands to keep the butter and shortening from getting soft. Incorporate until the mixture is crumbly and dry, like corn meal. Add ice water a bit at a time until the mixture forms a ball (up to 1/2 cup, you might not need all the water). Stop working as soon as the dough comes together or the crust will become tough.
– Divide dough in half and flatten to form a disk. Wrap in plastic wrap and chill for at least 30 minutes.
– After chilling, roll the dough on a floured surface to 10 inches.
– While the dough is chilling, mix berries, cornstarch, lemon and sugar.
– Pour into crust, and cover with second crust. Create edging and vents. If desired, brush crust with milk and sprinkle with sugar to create a glaze. Protect edges of the crust from burning with aluminum foil.
– Bake at 425 degrees for 15 minutes, and 20-25 minutes at 375 degrees (until top crust is golden brown).
Cool before serving with ice cream or whipped topping.


So, we have a blackberry bush in my backyard. 🙂 Do you think it will turn out the same using fresh as using frozen? Not that I’m gonna bake or anything, but for some reason this blog post makes me feel like I should try. 🙂
i DO think it would turn out well using fresh!
i’m totally jealous, we have a blackberry (and strawberry) bush too, but we’ve never gotten even ONE blackberry because the birds, etc. get to them first. we’re hoping to build a net around them one of these days…
in honor of your fresh blackberries, you should make a pie and let me know how it turns out. even if you buy the crust!
This recipe should be changed to “Tom and Steve’s…” Favorite pie. It is SO good. I am so hungry looking at this.
Ahh… REAL FOOD. THIS is my kinda food. Beautiful. Inspirational. Looks so yummy. Thank you so much for linking it up at SHARE IT, at FineCraftGuild.com. Pinned! A new party will open tomorrow and I sure hope to seeing you there again!
Yumm.. I’ve never made a blackberry pie before. Look delish..
Yum, we love blackberries at our house, this pie sounds incredible!
Looks delicious!! Hoping my plants produce enough berries this year. Pinned this to try! 🙂
Oh Yum! Your pie has me drooling. Thanks for sharing at the #HomeMattersParty – we’re looking forward to what you have to share next week. 🙂
~Lorelai
Life With Lorelai
This looks amazing. I love blackberries and this pie is great for this weekend. Thanks for sharing and stopping by from the Summer family fun party.
Who can resist blackberry pie? This looks so delish! Thanks for sharing at Merry Monday.
Beautiful pictures! I love blackberry pie, blackberries are so sweet and juicy when they are baked. My Mother in Law makes a pie she calls black & blue pie. Blueberries and blackberries! It is our favorite. Pinning this recipe so I can remember to make this something in the summer. Stopping by from Summer Family fun party.
Alexis @ http://www.chemistrycachet.com
What a gorgeous pie! I’m not a pie person, nor did I grow up in a house where pies were made and I never knew about the ‘keep everything as cold as possible’ rule (resulting in several disasters)! I’m so glad you mentioned it.
Awesome post.
My brother suggested I may like this website. He used to be
totally right. This publish actually made my day. You can not consider simply how much time I had spent for this info!
Thank you!